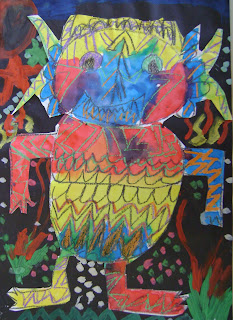


The Classic Children's Book Where the Wild Things Are is a fantastic starting point for a combined Literacy and Art Lesson. I have 6 classes all in the early Childhood part of the school ranging over 3 different ages groups. We have mainly split classes ie Year 1/2 or 2/3 which makes planning and how to cover something these students didn't have the previous year. Solution I do not repeat any lesson for quite a few years.
So I began the lesson with my year 3yrs and here is their results- just awesome. We used black crayon to draw the main shape, green, orange and purple crayons to add pattern. We then used the complementary colour dye to complete the Wild Thing. The monster was cut out. We painted the black backgrounds with acrylic paint mixed with a little white to add opacity. When dried we glued on the monster. Year 2/3 . Same monster idea but this time we used tempera paint on the black paper. Much more effective.Year 1/2 Same monster idea but we used oil pastels on green, purple or orange paper. _ - effective but students did not use the oil pastels well very smudgy and rather scribbly.
Last group 2/3- more of a challenge. We cut out our monsters from plain coloured card and then used the complementary colour as patterns which we cut from scrap card. The students then used colour burst pens to further embellish their monsters. The back grounds???? More to come on these ones.
Year 3 Children have now made the Clay Wild Things - We have now started our 3D clay monsters using pinch pot hollow forms. These kids are really going to enjoy this. The Clay Wild Things are a fantastic success. We use crayon to colour the clay- yes!! It was a technique I saw in one of the Art Education magazines I will follow this up and attribute it to the wonderful art teacher who wrote up the technique- Who needs to glaze? It takes up too much time and cost.
-To finish we used Sumi-e ink- I assume Indian ink might work but the sumi-e has I lovely shine to it. It is simply brushed over it . Make sure the kids apply the crayon as hard as possible to get a good solid coverage- if it is done too lightly the black ink overpowers the colour.
Thanks to the world of blogging- I have learnt so much this year - and it has certainly inspired me.

terrific! So many great ideas!
ReplyDeleteCRAYON???? I have to try this! Especially because my kiln is so hard to load! I would love to cut out a step once in a while!!!
ReplyDelete